

Quick summary
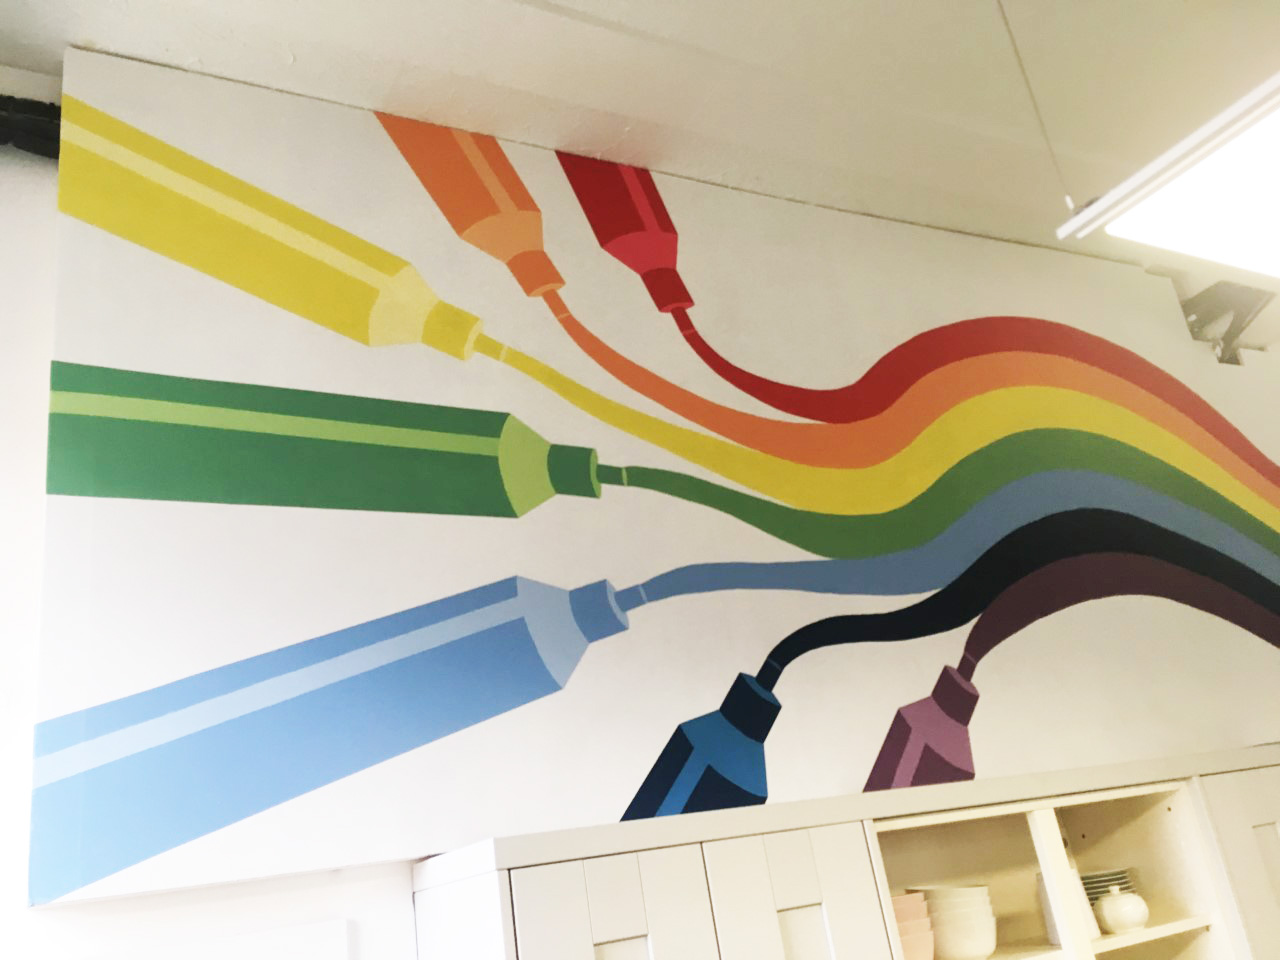
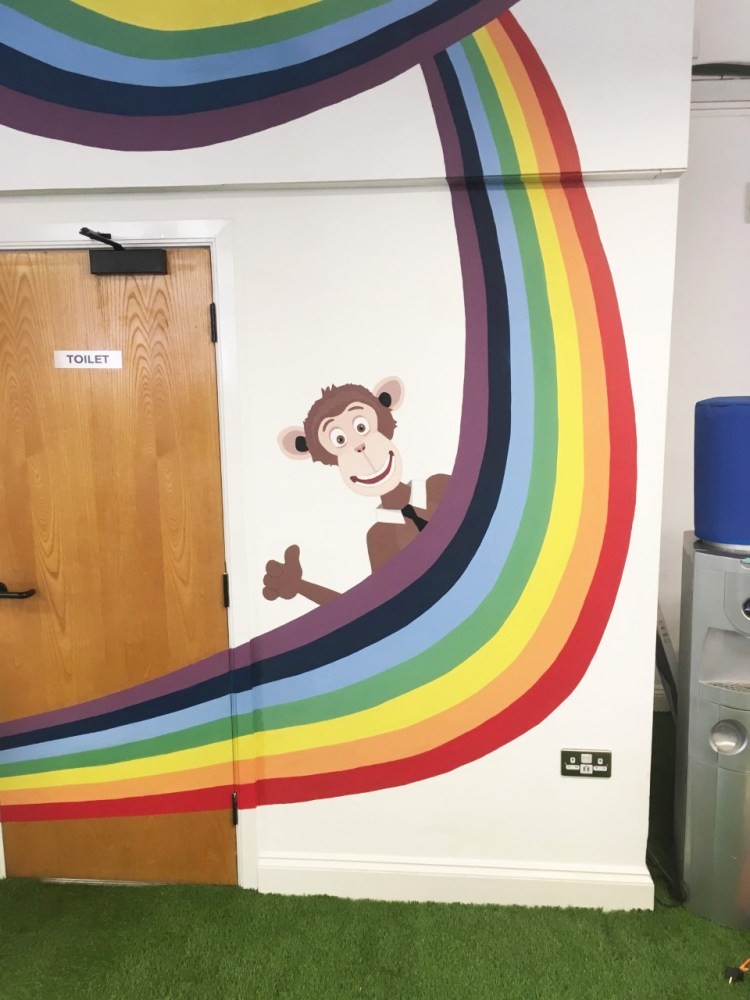
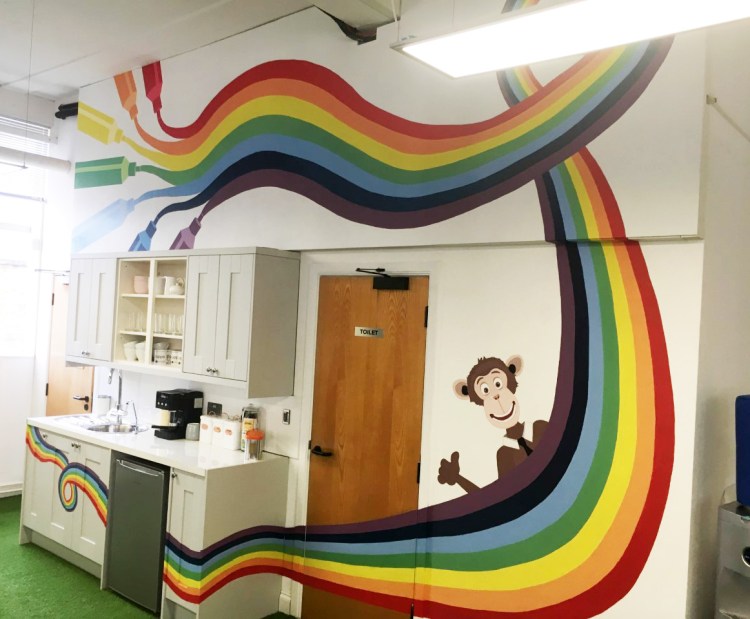
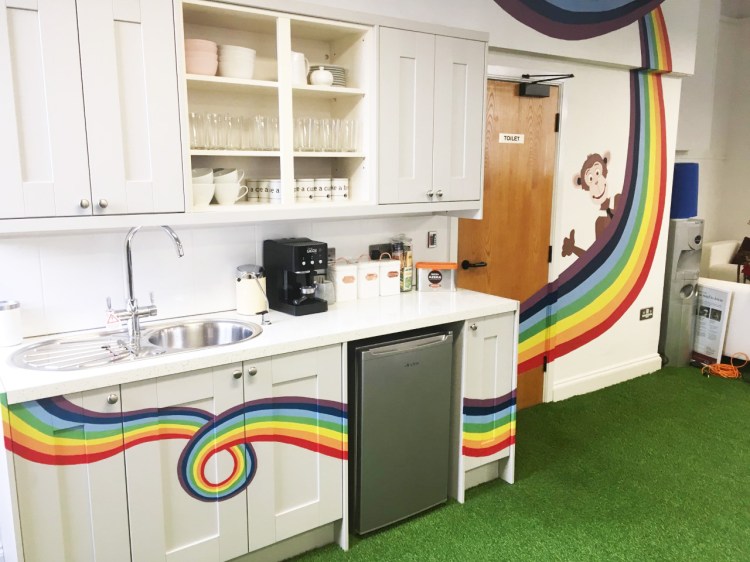
Office Mural. The company makes learning software for primary schools and wanted the mural to match their brand. Rainbows are bright and colourful and linked nicely with their coloured pens (part of the software). They also have a ‘coding monkey’ who they wanted to feature in the design. I used my usual emulsion paints plus a scissor lift to help me with this job.
More in-depth info
For this mural I was asked to design and paint a wall mural that fitted in with the branding of the company, and was not only on the wall but also included their new kitchen units in the design. Quite a challenge! 2 Simple provide teaching and learning software to primary schools and have a lot of cartoon-style imagery which is what I started off by looking at. Their different coloured pens, the ‘coding monkey’ and the rainbow have all featured in their branding images and I thought these would be great to include in the mural. Once I had agreed the design with the Managing Director and one of the company’s Graphic Designers, I started planning the best way to draw out and paint the design. The company hired me a scissor lift which was perfect to reach the higher parts of the mural.
I made myself 7 identical templates for the pens so that I could make sure all the pens were exactly the same size and shape. I could arrange the templates on the wall to decide the best position, before drawing around them to get to design on the wall.
When painting the pens I used the same colours that I was using for the rainbow, to create the appearance that it was these pens that had drawn the rainbow (although I don’t recommend drawing on the wall with actual pens, but painted mural pens are allowed).
To get the neat, straight edges of the pens, and also for the line through the middle for the highlight, I used Frogtape. (Frogtape is masking tape that’s a bit more expensive and is better at getting you those straight edges) #NotAnAdIJustLikeFrogtape
The main rainbow was probably the most challenging part of the whole mural. We’ve all drawn rainbows at some point in our lives I’m sure, but have you ever tried to paint one large scale on a wall? Not as easy as you would think! Also, you want to have smooth, neat lines between each colour, but as they are mostly curved lines in this design I couldn’t use my trusty tape and instead had to rely on my steady hand. Maybe not quite as steady as a surgeon’s hand but it’s pretty close.
I painted the main shape of the rainbow first and then used a meter rule to divide the rainbow into 7 equal parts. I painted every other colour of the rainbow and waited for it to dry, then filled in the remaining colours in between. I found this was the best way to make sure the colours wouldn’t blend together whilst painting them and it also helped to see if each colour was equal thickness.
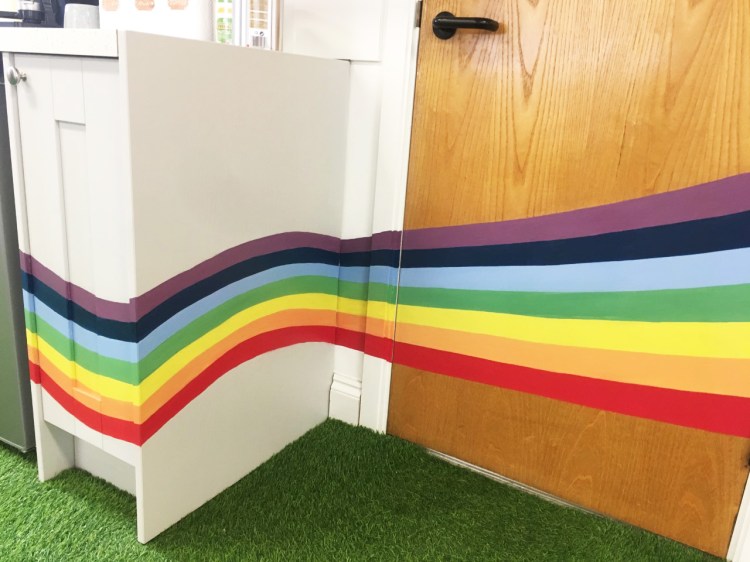
I thought the cupboard would be difficult as it’s a much glossier surface to a wall and you need to make sure the paint will stick, but it actually was very easy once I had decided on my method. Different artists and decorators have different advice on which types of paints you should use, but the method I went with worked really well and allowed me to use the same paints that I had used on the wall, meaning that the colours match perfectly. First of all I marked out where my rainbow would go. I then lightly sanded the areas to be painted, although this isn’t a necessity. I then painted the area with a primer which was ‘for difficult surfaces’ such as these cupboard doors. This creates a less smooth surface and something that the paint could stick to. Once dry, I painted the rainbow design using the same emulsions that I had used for the rest of the mural. I didn’t varnish the top until the next day so that I could be sure the colours were 100% dry before doing so. I used a clear varnish which was for this type of surface and for interior use. Once it was dry I test few areas to make sure this varnish had done the job and would allowed the mural surface to be cleaned if needed (I don’t know how but people seem to be able to splash tea on various kitchen surfaces, so it’s best to be safe! I’m probably also one of these people). I got a wet paper towel and rubbed over each of the colours of the mural. As expected, none of the colours smudged or came off onto the paper towel. The surface is easy to wipe clean without damaging the mural, which was my main concern, so now the tea-spillers can go about their business as usual in the knowledge that the mural is protected.
I’m really pleased with the mural, and it is my largest one to date! (December 2018). I had loads of positive comments from members of staff there and they said it really brightened up the office. It was a lot of fun to do and I have learnt a lot about painting on different surfaces.. as well as how to use a scissor lift!
